

Last updated September 2026. Based on Sauder's own assembly manuals and parts documentation.
You are moving house, or taking a bookcase apart to get it up a staircase, and you have hit a fastener that does not look like anything else in flat pack furniture. It is one piece, it has a Phillips head, and there is a stub of dowel sticking out of the side of it into the next panel.
That is Sauder's TWIST-LOCK fastener, a registered Sauder design. And the reason you cannot find instructions for removing it is simple: Sauder has never published any. Every manual tells you how to put it in. Not one tells you how to take it out.
So here is the honest version. We went through Sauder's manuals, its parts process and its warranty terms. Below is what Sauder actually documents, what it does not, and the defensible way to get the fastener out without wrecking the panel.
First, know which fastener you are looking at
Sauder uses several systems and people mix them up constantly. Getting this right decides how you approach removal.
| Sauder's own name | What it is |
| TWIST-LOCK fastener | A one-piece connector with a Phillips head. The body sits in a large cam-style hole in one panel, and an integral dowel end projects out into a hole in the mating panel |
| Hidden cam and cam dowel | The familiar two-piece system. A metal cam disc in one panel, a separate cam dowel screwed into the other |
| Hidden connector | A separate Sauder system with its own assembly video |
| Back panel nails | Thin hardboard backs are nailed on, often 40+ nails, using a supplied nail holder tool |
| T-lock / T-slot box drawer | A drawer box construction method, covered by US patent 6,413,007. Nothing to do with back panels |
| Slide-on moulding | A T-shaped tongue on the panel edge sliding into a grooved moulding. US patent 5,499,886, no fasteners involved |
Two corrections worth making up front. First, "T-lock" in Sauder language is a drawer, not a back panel fastener. Second, there is no Sauder system called "Quick-Lock". If a page mentions one, that page is not describing Sauder furniture.
Is the twist-lock on my back panel or not?
Both answers are correct, depending on what you own.
- Thin hardboard backs are nailed. Sauder's instruction reads: fasten the BACK to your unit using the NAILS. On one bookcase that is roughly 44 nails
- Structural backs, the kind used on drawer pedestals and desks, are fastened with twist-locks. Sauder's instruction reads: fasten the BACK to the LEFT END, tighten two TWIST-LOCK FASTENERS
Check your instruction book's parts list. The twist-lock is listed as its own numbered item with a count, for example 37F TWIST-LOCK FASTENER, 16, or 7F TWIST-LOCK FASTENER, 12. If it is not in your parts list, your model does not use them.
How Sauder installs it (this is the key to removing it)
The install instruction is near identical across every manual we checked, and it tells you exactly how the thing engages:
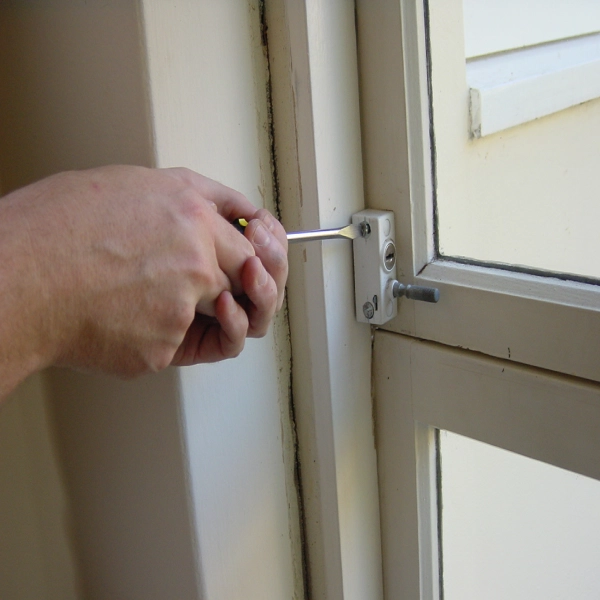
1. Push a TWIST-LOCK FASTENER into the large hole in the part
2. Insert the dowel end of the fastener into the hole of the adjoining part. Sauder adds a note in capitals: the dowel end must remain fully inserted in the hole of the adjoining part while locking the fastener
3. Tighten the fastener with a Phillips screwdriver as tight as possible
What that tells us mechanically: turning the Phillips head clockwise draws the dowel end inward, pulling the two panels together. It is a cam action inside a one-piece body, not a bolt threading into a nut.
There is a second useful clue. Some Sauder steps say explicitly: do not tighten the TWIST-LOCK FASTENERS in this step. Sauder expects them to sit loose and be tightened later in the build, which means backing one off is a normal state the design tolerates.
How to remove it
Say this plainly to yourself first: Sauder publishes no removal procedure, no unlock direction, no degree spec, and no statement about whether the fastener is reusable. What follows is the reverse of Sauder's own documented assembly step, which is the only defensible method. Work slowly and stop if something feels like it is about to split.
1. Use a number 2 Phillips screwdriver, by hand. Do not use a drill or impact driver. The head is plastic and the surrounding material is particleboard
2. Turn the head counter-clockwise until it stops resisting. You are releasing the internal cam, so you should feel the tension on the joint go slack
3. Support the panel so its weight is not hanging on the joint. Once the cam releases, the joint is the only thing holding the panel
4. Draw the two panels straight apart along the axis of the dowel end. Do not twist them apart or lever them, because the dowel end is still sitting in the mating hole
5. Once the panels separate, lift the fastener body out of the large hole
6. Keep every fastener together in a labelled bag. They are model specific and you will not find them at a hardware shop
If it will not release
- Check you are turning the correct way. Counter-clockwise loosens, the same as any screw
- Check whether the joint is glued. Sauder uses glue in dowel holes on many models and warns in capitals that disassembly of glued parts is extremely difficult. If your parts list includes GLUE, some joints are permanent. The fastener releasing will not free a glued dowel beside it
- If the Phillips head strips, stop. Forcing it will chew the head out entirely and leave you with no way to release the cam. At that point the honest options are to leave that joint assembled and disassemble around it, or to accept damaging the panel
Hidden cams: the other fastener, and the one number Sauder does publish
If yours is a two-piece hidden cam and cam dowel rather than a twist-lock, Sauder does give a specification, and it is a useful one.
The cam rotation to lock is stated as a minimum of 190 degrees and a maximum of 210 degrees. That is roughly half a turn, not the quarter turn people assume. So to release a hidden cam you are turning it back around half a turn, not a quarter.
Sauder does not state which absolute direction locks or unlocks a hidden cam, only that drawer front cams are turned clockwise or counter-clockwise to raise or lower fronts. The general flat pack convention is clockwise to lock and counter-clockwise to release, but treat that as industry practice rather than Sauder guidance and turn gently until you feel which way frees the joint.
You will also see plenty of advice online about stripped cams and worn particleboard holes. Sauder does not address either anywhere. Those are real problems, but they come from users, not from the manufacturer.
Does Sauder even want you taking it apart?
It never says yes, and it never says no. Sauder's Common Questions page covers materials, cleaning, finishes, assembly time, tools, casters, backs, warranty and company history. There is no question about disassembling, moving or reassembling anywhere on it. Same for the warranty page.
What Sauder does warn:
- Disassembly of glued parts is extremely difficult. Inspect parts thoroughly before assembling
- The back is structural. Sauder's own words: the back helps to square the unit while also providing crucial stability and overall safety. One manual is blunter: do not stand the unit upright without the BACK fastened, the unit may collapse
- Modification voids the warranty. The exclusions name alteration or modification, and failure to follow assembly instructions or warnings
On moving, Sauder's only documented advice is this: do not push furniture, especially on a carpeted floor. Have a friend help you lift the item and set it in place.
Read together, the sensible interpretation is that Sauder designs for one assembly. If you can lift the piece intact, lift it. If you cannot, disassemble knowing the fasteners and holes are the weak point, not the panels.
Ordering a replacement twist-lock
Good news here. The twist-lock carries a part ID in your instruction book's parts list, which is exactly what Sauder's order form asks for. It is orderable.
The process
1. Go to sauder.com/service/replacement-parts
2. Enter your model number, which Sauder describes as the five or six digit number on your furniture's Instruction Book
3. Enter the Part ID from the parts list, for example 37F, plus the quantity and a reason. One of the reasons is Buy Extra Parts, for when nothing is defective
4. Fill in shipping details. Note that Sauder does not ship to P.O. boxes, and the form asks how the carton was sealed, taped, stapled or glued, plus whether the address is residential or commercial
Where the model number is, and the catch
Sauder points you at the instruction book, not the furniture. The model number and the lot number are both on the booklet. The lot number is in the lower right corner of the cover, printed like Lot # 541785 03/09/20.
If you have thrown the booklet away, Sauder does not publish an alternative location, so the documented route is to call them rather than hunting for a label behind the back panel.
Cost and timing
- Parts are supplied under a limited warranty to replace missing or defective Sauder parts. The Buy Extra Parts option implies paid purchase outside a defect claim, and Sauder publishes no price list
- If your warranty has lapsed, the site returns a message saying replacement parts are no longer available for that product number
- Shipping speed is quoted two ways in Sauder's own manuals: most replacement parts ship in one or two business days, and elsewhere within 48 hours excluding weekends and holidays
- Contact: call or text 800.523.3987, Monday to Friday 8:30am to 5:00pm ET. Some manuals list 877-996-7539. Postal address is Sauder Woodworking Co., 502 Middle Street, Archbold, OH 43502
- Order tracking is at sauder.com/service/track-parts-order
Warranty, briefly
Sauder manuals state a five year limited warranty from date of purchase against defects in materials or workmanship, for the original purchaser. But the current web warranty page says the period varies by product and is shown on each product page, so check your own model rather than assuming five years.
It covers defects in materials or workmanship, defined as imperfections which substantially impair the utility of the product. Sauder can repair, replace or refund the component.
It excludes: failure to follow instructions or warnings, misuse or abuse, intentional damage, fire, flood, alteration or modification, improper maintenance, and rented, used or as-is product. Replacement parts are warranted only for the remainder of the original period.
FAQ
Can Sauder twist-lock fasteners be reused?
Sauder does not say. Nothing in any manual states whether they are reusable or single use. In practice, removing one gently and finding the cam still turns freely is the only test available. Order spares before a move rather than after.
Which way do you turn a Sauder twist-lock to remove it?
Counter-clockwise, the reverse of Sauder's tightening instruction. Sauder publishes no unlock direction or degree spec, so turn by hand and stop when the joint goes slack.
Can I take apart Sauder furniture and put it back together?
Sauder never says you can and never says you cannot. Glued joints are called out as extremely difficult to separate, and the back panel is structural and must be refitted. Mechanically fastened joints do come apart, with the fasteners and the holes taking the wear rather than the panels.
How do I find my Sauder model number without the manual?
Sauder only documents the instruction book as the location. If you no longer have it, call or text 800.523.3987. Do not rely on third party pages telling you to look under the base or behind the back, as Sauder does not confirm a label there.
Is the Sauder twist-lock the same as a cam lock?
No. A cam lock is two pieces, a metal cam disc and a separate cam dowel. The twist-lock is one piece with the dowel built into the body. They come apart differently, which is why using cam lock instructions on a twist-lock does not work.
Bottom line
The twist-lock is not complicated, it is just undocumented. Turn the Phillips head counter-clockwise until the joint goes slack, pull the panels straight apart along the dowel, and lift the body out. Go by hand, never with a drill, and support the panel while you do it.
Two things will actually ruin your day, and neither is the fastener. One is glue, which Sauder warns is effectively permanent. The other is the back panel, which is structural and must go back on before the unit stands upright. Plan around those and order spare fasteners from Sauder before you start, not after you have snapped one.
Did you like our blog?
Comments (0)
All comments are reviewed and approved by an admin before appearing publicly.
No comments yet - be the first to share your thoughts.